Showing posts with label Halloween. Show all posts

Sunday, October 10, 2010

Wickedly Fun Halloween Workshop

Hi Stampers!

Here are the very fun, cute, and wicked projects we made at my Halloween Workshop last Sunday. I am so happy to say that the gals loved all 3 projects, especially how easy and fast they were to create. I was looking forward to this workshop because I LOVE Halloween, especially creating projects with NEW Halloween Stampin' Up! products. So enjoy looking at the projects and feel free to Contact Me if you have any questions. =)


Group shot of the projects. Don't you just love them? ;o)


Here's the card we made. I right away knew I had to have this stamp set when I saw it in the NEW Idea Book & Catalog. Every year, when the new catalog comes out, I quickly turn to see what new Halloween goodies there are, and I'm never disappointed. This card is made using the Wicked Cool Stamp Set. I love, LOVE, this set. =)

Do you notice the fun background on the card? It's made using the NEW Spider Web Textured Impressions Embossing Folder. I love these folders because they make it so easy to add texture to your card base! The gals loved how quickly they were able to do this.

The strip of paper is from the coordinating Wicked Fun Specialty DSP. This paper has 2 sheets that have flocking on them, the bats and the orange with black dots. That makes this paper even more fun! ;o) I CASED this card from Angie Juda, and just changed a few things.


Here is the inside of the card. I simply added a layer of Whisper White and stamped the greeting from the Wicked Cool Stamp Set. This way, it makes it easier to write a message to your recipient. =)


Here's the Pillow Box we made. Inside are a couple of Hershey's Nuggets. Another quick and fun project. After the workshop I realized that I could have embossed the cardstock with the Spider Web Embossing Folder to make it even more fun. Wish I would have thought about it beforehand! =( But, Halloween is still a few weeks away so I still have time to play. ;o)

The tag is made with the Scaredy Cat image from the Batty for You stamp set. This set is fun because it comes with eight different images and you can quickly make a bunch of the pillow box candy goodies with matching tags. Quick note, it turns out that the Pillow Box die that is in the NEW catalog is different from the one I currently own. Sizzix updated the die and the flaps are now easier to open and close. So you will notice that when you order yours. I am seriously thinking about getting myself the new one. =)


And last, but certainly not least, the Fall Owl M&M baggies! Aren't these adorable!! I love, LOVE Owls and when Stampin' Up! came out with the NEW Owl Punch, it was one of my first purchases. I simply cannot get enough out of it, and it is so easy to use and assemble the pieces! I participated in a bulk buy with some other demonstrators to get the cute skinny bags that M&Ms are in. Aren't they cute? If you'd like to order your own, you can go to Clearbags.com to get some.

I initially wanted to use the Halloween M&Ms that I had bought last year, but I was not able to find them at any of the stores I went to this year. Last year, they were purple, green, orange, and black. They coordinated perfectly with the Wicked Fun DSP colors. But, I went to 4 different stores and didn't find them. =( So I found these fall colored M&Ms and just switched out my ideas. They turned out to match perfectly with our More Mustard, Chocolate Chip and Ruby Red cardstock. =)


Well, I hope you enjoyed your visit and looking at the cute and fun projects we made. Just a reminder, that Oct. 18 is the last day to join my Stampin' Up! Family and receive the Green House Gala Craft Tote for free! I love this tote, and it's size. I take it to all my workshops! Have a great Sunday and

Happy Stampin'!


Click Here to email me.
Click Here to order from me 24/7.


New Halloween Goodies

Good Afternoon Stampers!

Today I just wanted to quickly share with you some of my NEW Halloween Goodies that I got and used for my Halloween Workshop this past Oct. 3 (World Card Making Day). For those who don't already know, Halloween is my favorite holiday and I love creating projects, decorating and spending money on all the NEW Halloween Goodies that Stampin' Up! comes out with each year! =)


These are 4 of the NEW Items I treated myself to. I love them! ;o)


Here's a close-up of the bats from the Wicked Cool Specialty DSP. I don't know if you can see, but the bats are flocked! I was very pleased to see that. =)


Lastly, the beautiful Raven Trim Lace and the brand NEW Spider Web Embossing Folder. Love it!!


I'll share my Halloween Workshop Projects later on as well so do come back to see those. They were all fun and quick to make!


Click Here to Email Me.
Click Here to Order from me 24/7.

Happy Stampin'!

Wednesday, September 1, 2010

Last of the Halloween Projects

Good Morning Stampers!

Today I'm sharing the last of the pictures of the Halloween Projects that I took at the Color Confections Shop at Convention. I especially love the Decor Elements on the windows. Enjoy!


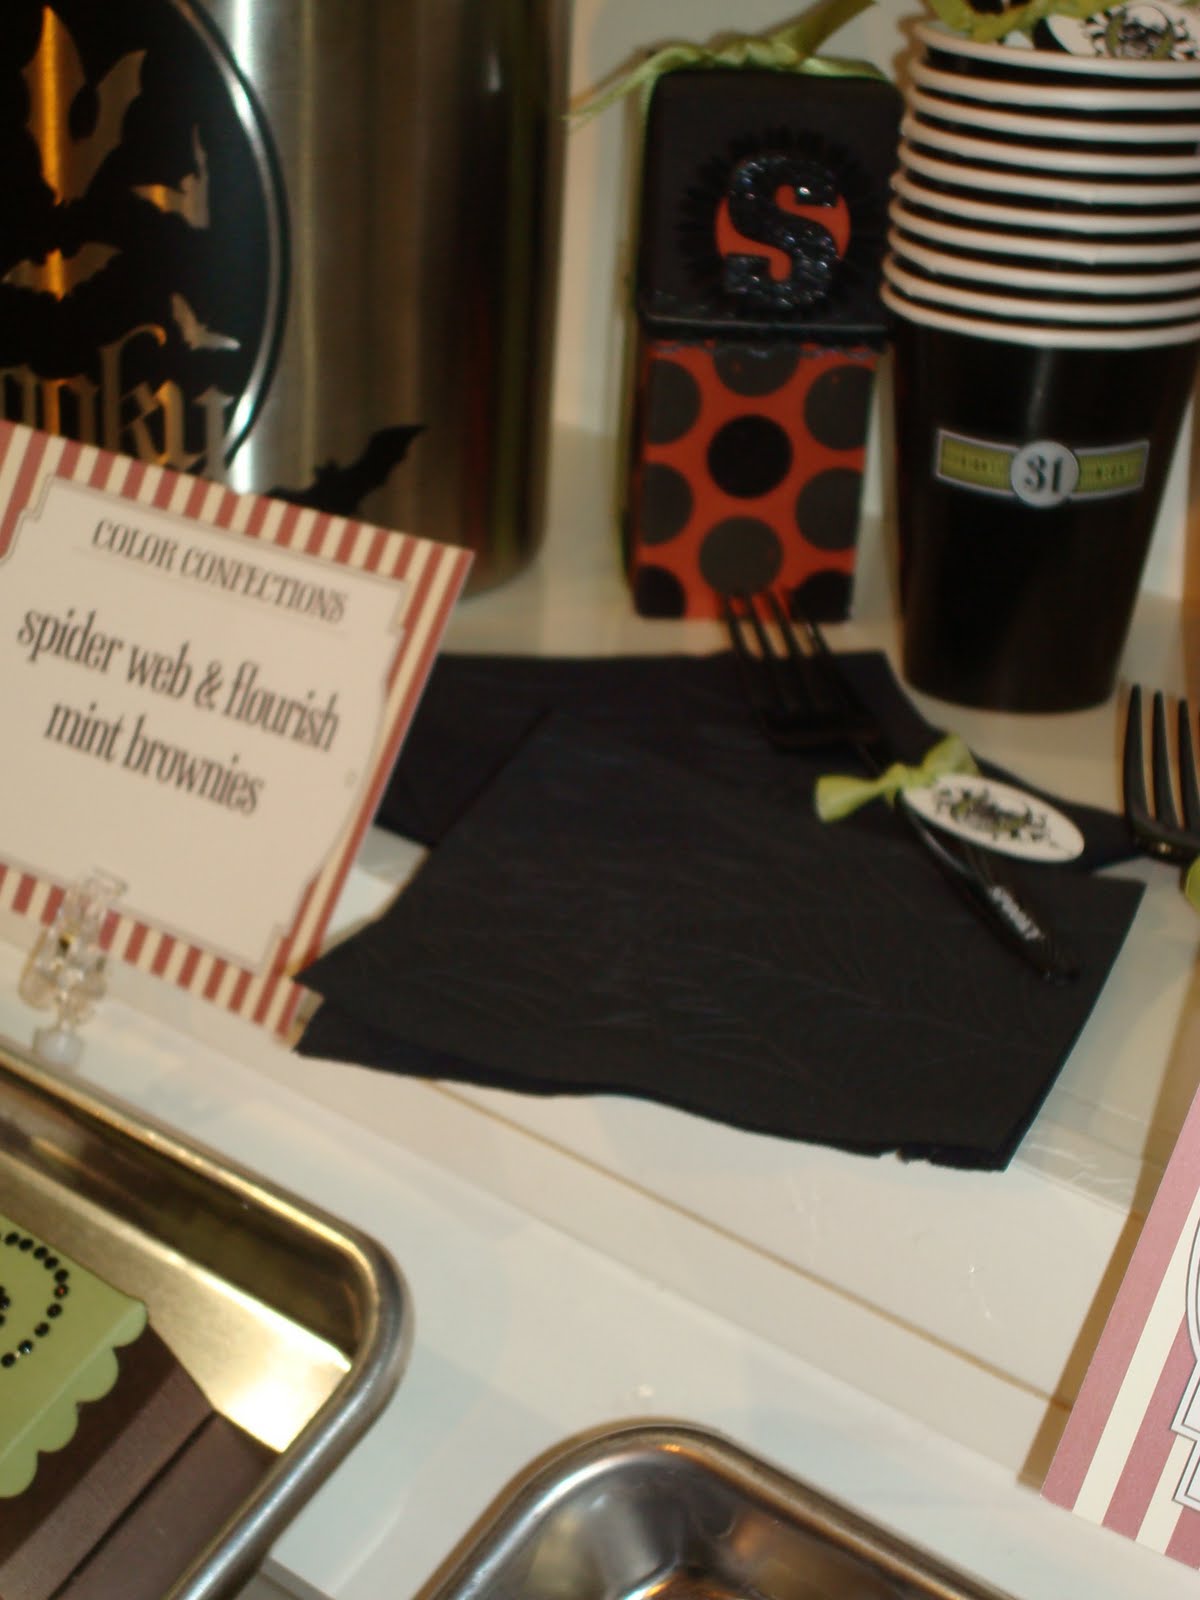
I don't know if you can tell in this picture, but the napkins were embossed using the NEW SpiderWeb Embossing Folder. Very neat idea!


Remember to come back tomorrow to see my swap cards and stay tuned the rest of the week for even more projects! =)

Have a great day and Happy Stampin'!


Click Here to Order from me 24/7.
Click Here to Email Me.
Click Here to visit my Stampin' Up! site.

Tuesday, August 31, 2010

More Halloween Projects

Good Morning Stampers!

Here are more wonderful Halloween Projects from the Color Confection Shop at Convention. I was just "Oohing" and "Ahhing" the whole time I was in there, especially over the Halloween projects. Enjoy! =)


Have a great day and Happy Stampin'


Click Here to Order from me 24/7.
Click Here to Email Me.
Click Here to visit my Stampin' Up! site.

Monday, August 30, 2010

Confection Shop Display

Hello Stampers!!!

Wow, I can't believe how long it's been since my last post. I apologize for being away for so long, but life pretty much got crazy. I also went back to work for the last 2 weeks of the summer program and also did some house, dog and cat sitting. Like I said, crazy busy! LOL

So seeing as how the summer heat wave seems to have receded here in Southern California, and it seems like all the craft stores have said good-bye to Summer and hello to the Fall, I decided today I'd share pictures of the Halloween projects that were shared at Convention this year.

I've got to tell ya, as much as I love the Summer weather for some reason, Halloween is my favorite holiday! So I was in heaven when I saw all these great samples!! Hope you are as excited about these new products and projects as I am! =)


Here is the entrance to where the displays were being shown. This place was amazing! Lots of yummy paper crafting goodies.


Many of these items will be available starting Sept. 1 through the Holiday Mini Catalog. Most of you should have received them by now. If you have not and would like a copy please EMAIL ME and I will mail one out to you.

Tomorrow I'll be sharing more of these fabulous pictures of Halloween projects and stay tuned for the rest of the week where I'll be sharing pictures from the last 2 workshops I had this month, my thank you cards and of course my swap cards from Convention! So be sure to come back or better yet, bookmark my blog so you'll know when and where to come back! ;o)

Quick reminder that tomorrow is the last day to order from the Summer Mini Catalog, so be sure you have all the items you want before it's too late!

Have a great day and Happy Stampin'!


Click Here to Order from me 24/7.
Click Here to Email Me.
Click Here to visit my Stampin' Up! site.

Friday, September 11, 2009

Holiday Mini ShoeBox Swap Part 1

Hi Stampers!

I can't believe it's Friday already! How quickly this week has gone by. Luckily, I had today off because we worked hard this week cleaning and setting up the classroom for the return of all the children on Monday. Woohoo, it's going to be an interesting year! :o)


Today I'll be sharing two out of nine projects that we made last month at a Holiday Mini ShoeBox Swap my upline, Yolie held for us at her house. I couldn't stay the whole time but boy was it fun!


The above card is the one I made. If you don't know by now, my favorite holiday is Halloween. I own tons of Halloween sets many retired, that I will never part with because I just love them too much. I enjoy everything about Halloween, the colors, costumes, treats, decorations, etc. So of course I had to make a Halloween card using the NEW Sweet Centers Stamp Set and the NEW Halloween DSP, Cast-A-Spell. I actually saw this card on Becky Robert's site Inking Idaho, and knew right away that I wanted to CASE it. I decided not to use the leaves because it would be too time consuming for everyone to stamp and cut out so many leaves. Of course, Becky's card is a lot more detailed but I still love the way my card came out and hope you do too.


All Supplies Stampin' Up!
Stamps: Sweet Centers
Ink: Black Staz-On Ink
Paper: Perfect Plum, Basic Black, Pumpkin Pie, Cast-A-Spell Designer Series Paper
Accessories: Pumpkin Pie 1/4" Grosgrain Ribbon, 1" Circle Punch, 1-1/4" Circle Punch, 1-3/8" Circle Punch, Scallop Circle Punch, Scallop Edge Punch, Paper Piercing Tool, Stampin' Dimensionals, Paper Snips


This next card was made by Maria Carillo, She CASED this card directly from the Holiday Mini. She used the NEW Halloween Set Twick or Tweet and coordinating Jumbo Stampin' Around Wheel, Haunting Hill. She also used the brand new Specialty DSP from the Holiday Mini, Night & Day. Isn't it cute? I love it!


All Supplies Stampin' Up!
Stamps: Twick Or Tweet
Ink: Basic Black, Basic Black Stampin’ Around Jumbo Cartridge
Paper: Whisper White, Basic Black, Pumpkin Pie, Night and Day Specialty Designer Series Paper
Accessories: Pumpkin Pie 1/2″ Striped Grosgrain Ribbon, Linen Thread, Pumpkin Pie Corduroy Buttons; Chit Chat Rub‐Ons; Stampin’ Dimensionals; Sizzix Big Shot; Top Note Bigz die


Well, that's all for today stampers. Have a great Friday and Happy Stampin'!

Wednesday, November 12, 2008

Halloween Goodies, Finally...

Hi Stampers! As promised here are the Halloween Goodies I made for some friends as well as for the children and some of the teachers at the school I work at. Again, I apologize for taking so long to get these posted but better late than never! All the projects were so quick and easy to do, if you'd like more details on any of the items feel free to email me and I'll give you the info. you need. Enjoy!


The Bags I made above are actually called, Box in a Bag. They come together so fast using Designer Series Paper and cardstock. For these, I used the Ghostly Greetings Designer Series Paper, Pumpkin Pie and Basic Black Cardstock. The image is from the Eat, Drink and Be Scary set available in the Holiday Mini Catalog. It was stamped using Basic Black in onto Pumpkin Pie Cardstock and punched out with the Small Tag Punch. The Basic Black layer is punched out using the Tag Punch. I then used the Round Tab Punch to punch the "handles" for each bag out of Basic Black and Pumpkin Pie Cardstock. I used the Black Grosgrain and Only Orange Grosgrain Ribbon to tie the bags closed. Oh, and I attached the tags to the ribbon using Fibers that are no longer available through Stampin' Up! Directions on how to assemble these bags can be found at Inking Addict. Scroll down towards the end of this post for details on how to make the candy bar wrappers!

All Supplies Stampin' Up!
Stamps: Eat, Drink and Be Scary
Ink: Basic Black
Paper: Ghostly Greetings Designer Series Paper, Basic Black, Pumpkin Pie
Accessories: Black Grosgrain Ribbon, Only Orange Grosgrain Ribbon, Fibers, Crop-A-Dile, Round Tab Punch, Tag Punch, Small Tag Punch, Scallop Edge Punch, Sticky Strip


This is a group picture of the goodies I made for the children from my school. We have a "No Candy" policy so the chocolate bars went to the teachers and the bags and pencils went to the children.


The Cello bags were made using the Medium Flat Cello bags and sealed with the topper made out of Pumpking Pie and Basic Black Cardstock. Again the tag was made using the Eat, Drink and Be Scary set from the Holiday Mini. I stamped the witches hat, onto Whisper White Cardstock using Basic Black ink and cut out then attached with Stampin Dimensionals. Like I said before, our school has a "No Candy" policy so the treat bags included Teddy Grahams, Play-Doh, a bug and some Halloween Shaped Marshmallows. The children and parents loved them!

All Supplies Stampin' Up!
Stamps: Eat, Drink and Be Scary
Ink: Basic Black
Paper: Basic Black, Pumpkin Pie
Accessories: Small Tag Punch, Tag Punch, Stampin' Dimensionals, Paper Snips, Medium Flat Cello Bags


These adorable pencil holders were CASEd from Jamie Sears' blog, Stamping Mommy of 4. I had to change my measurements because hers is for 3 pencils and I was only going to include 1 pencil for each child. Aren't they great? And again, they are so easy to make! I got the pencils at Walmart, I think they were 10 pencils in a pack for $1! Once again, I used the Ghostly Greetings Designer Series Paper and Basic Black Cardstock. The pouch is sealed closed using 2 brads on each corner, which were hidden by tying a ribbon around the pouch using the Only Orange Grosgrain Ribbon. Then just take your pencil and tuck it in the pouch and it's done!


All Supplies Stampin' Up!
Stamps: None
Ink: None
Paper: Ghostly Greetings Designer Series Paper, Basic Black
Accessories: Only Orange Grosgrain Ribbon, Silver Mini Deco Fasteners, Paper Piercer


And lastly, one of the funnest projects I made were these Frankenstein and Mummy Candy Bar Wrappers! I just love the way they turned out! And tucked in each one is either a fun size Kit Kat Bar or Hershey's Bar! I got the idea and instructions from again, the fabulous Angie Juda at ChicNScratch. Thanks for the idea Angie! The tutorial for the Mummy can be found here, and for Frankenstein here.

The Frankenstein is made out of Old Olive Cardstock and the hair using Basic Black Cardstock. I cut his hair out myself, just used the Paper Snips and cut jagged lines of different lengths. Very Easy. I drew in the nose and mouth using a Basic Black Stampin' Write Marker. The eyes were made by punchin out the circles from Whisper White Cardstock using the 1/2" Circle Punch and punching out circles from Basic Black Cardstock using the 1/4" Circle Punch.

For the Mummy, I used Creamy Caramel and Very Vanilla Cardstock. The Very Vanilla is torn into different sized strips and sponged with Creamy Caramel Ink to give it an aged look. The eyes are made out of Whisper White and Basic Black Cardstock using the 1/8" and 1/4" Circle Punches.

All Supplies Stampin' Up!
Stamps:
None
Ink: Creamy Caramel
Paper: Old Olive, Creamy Caramel, Whisper White, Very Vanilla, Basic Black
Accessories: 1/2" Circle Punch, 1/8" Circle Punch, 1/4" Circle Punch, Paper Snips, Basic Black Stampin' Write Marker, Stampin' Sponge

Phew! Well, that's it. I hope you enjoyed looking at my samples. Stay tuned tomorrow for some more samples from a Holiday Mini Class I participated in. Until then, Happy Stampin'!

My 2nd Signature

Tuesday, November 11, 2008

Halloween Treats Class

Hi Stampers! I first want to apologize for the lack of posts this last week or so. As you know from my last post, I was sick (food poisoning) and just did not have th energy to post or stamp. Then, on Thursday I had to fly out to Dallas, TX for the NAEYC Conference and was gone through Sunday. I was hoping to get some stamping done and post on my blog but life got in the way as it tends to. So again I apologize and I do still have some of the Halloween treats that I made for some friends, teachers and the children at my school.

Today I'll be sharing some projects that I made through the Halloween Treats Class that the wonderful Angie Juda had available over at ChicNScratch. I love her blog, so do check it out when you get the chance! The projects were so much fun and easy to make, I had a blast! Hope you enjoy viewing them as much as I enjoyed making them!


Here is a group shot of the projects that I made. Angie also had a Peppermint Patty Halloween Sandwich project and matching Cello Bag but as crazy as this sounds, I could not find any of the Peppermint Patties anywhere! I looked and looked, and found some square ones but not the round ones, which are what I needed. Well, if I find them I will make the final project and post it here. (crossing my fingers) Aren't the projects just great! I love the Frankenstein box!

Here's Frankie! He is so stinkin' cute I can't stand it! I had a blast making this box, and it came together quick and easy too! Now Angie provided all the supplies needed to create the projects (paper, accessories, etc.) but not the stamped images since it is against Stampin' Up! policy to do so. For the Frankie Box she even provided the wire for the handle!

Okay now for the details: the box is made out of Kiwi Kiss cardstock and the hair is made using Basic Black textured cardstock. The hair was provided already cut, but I believe Angie uses a scrapbooking template to cut the hair. If you wanted to, you could just as easily cut the hair freehand making sure to make jagged, long and short cuts. The white of the eyes is punched with the 1" circle punch out of Whisper White cardstock. The eyelids and nose are also punched with the 1" circle punch using Kiwi Kiss cardstock. Lastly, the black part of the eyes is punched using the 3/4" circle punch out of Basic Black cardstock. I adhered the eyelids and nose with Stampin' Dimensionals, songed some Basic Black ink on them. Then I used the Signo White Gel Pen to make the eye accents. I recommend using Sticky Strip to assemble the box, to ensure that it doesn't come apart. The last step is to punch 1/8" circles on either side of the box, twist the wire around a pencil, pull it through and using wire pliers bend the ends. OH, I almost forgot his mouth! I used the Basick Black Stampin' Write marker to make his mouth, which is basically a "W". Quick and easy don't you think?!


All supplies Stampin' Up! (unless otherwise noted):
Stamps:
None
Ink: Basic Black
Paper: Kiwi Kiss, Basic Black Textured Cardstock, Whisper White
Accessories: 1" Circle Punch, 3/4" Circle Punch, 1/8" Circle Punch, Basic Black Stampin' Write Marker, Signo White Gel Pen, Stampin' Dimensionals, Stampin' Sponge, Wire pliers and Rebar Wire (non-Stampin' Up!)


The final two projects were the Pillow Box and the Basket. Both items were made using the Big Shot and the Pillow Box die and the Baskets and Blooms Die. The Ghostly Greetings Designer Series Paper was also used for both projects. Again they came together rather quickly. For the tag on the Pillow Box you will need to punch out the large tag out of Basic Gray cardstock and the smaller tag out of Whisper White Cardstock. Before punching out the small tag, you will need to stamp your image from the Eat, Drink and Be Scary set. You will need to color in the image using Old Olive, Pumpkin Pie and Basic Black Stampin' Write markers, and then stamp unto the Whisper White. Once this is done, you will take your Small Tag Punch, line it up and punch. I then used my Crop-A-Dile to punch a hole at the edge of the tag and adhered a brad. Use black thread to attach the tag to the Basic Gray Taffeta Ribbon around the pillow box. Again use sticky strip when putting together the pillow box to make sure it stays together. Also, make sure you fill the box with your goodies before sealing it up the ends!

The Basket has no stamping required! You just run the die through the Big Shot using the Basket and Blooms Die and Ghostly Greetings Designer Series Paper and assemble. Of course, remember to use Sticky Strip. Then add the Basic Gray Taffeta Ribbon, add your goodies and you're done! How quick is that?!

Oh, I almost forgot about the test tube! This was provided for us and I believe Angie bought them at Michael's they are from Martha Stewart and were available during Halloween. I'm not sure if they are still available. You just basically stamp your image from the Batty For You stamp set, onto Whisper White Cardstock using Green Galore ink and punch it out with the 1" Circle Punch. Then stamp the image again onto Green Galore cardstock using Basic Black ink and punch this out using the 1-3/8" Circle Punch. Attach the Frankenstein image onto the Green Galore circle and punch out a Scallop Circle out of Basic Black cardstock. Attach the first two layers onto the Scallop Circle using Stamin' Dimensionals. Take your Paper Piercing Tool and pierce holes in the center of each scallop. Then thread through the Black Grosgrain Ribbon, tie it around the test tube and voila! All that's left is to fill them with your goodies. I filled mine with M&M's but forgot to take a picture of it. Sorry!

All Supplies Stampin' Up! (unless otherwise noted)-Pillow Box and Basket:
Stamps: Eat, Drink and Be Scary
Ink: Basic Black, Pumpkin Pie and Old Olive Stampin' Write Marker
Paper: Basic Gray, Whisper White, Ghostly Greetings Designer Series Paper
Accessories: Pillow Box Big Shot Die, Baskets and Blooms Big Shot Die, Big Shot, Small and Large Tag Punch, Crop-A-Dile, Black eyelets, Black thread, Basic Gray Taffeta Ribbon

All supplies Stampin' Up! (unless otherwise noted)-Test Tube:
Stamps: Batty For You
Ink: Basic Black, Green Galore
Paper: Basic Black, Green Galore, Whisper White
Accessories: 1" Circle Punch, 1-3/8" Circle Punch, Scallop Circle Punch, Black Grosgrain Ribbon, Paper Piercer, Stampin' Dimensionals, Test Tube (non-Stampin' Up!)

Well, that's it for tonight! Happy Stampin'!

My 2nd Signature